Itineraries
Itineraries are the heart of Autoura. An itinerary is a day-by-day trip plan with pricing that you send to clients as a quote.
Viewing Itineraries
Go to Itineraries in the sidebar. At the top, you see six status cards:
- Total — All itineraries, regardless of status
- Draft — Still being prepared
- Sent — Sent to the client
- Confirmed — Client accepted
- Completed — Trip is over
- Cancelled — Client declined
Click any status card to filter the list. Use the search bar to find by client name, trip name, or itinerary code. Each row also has an inline status dropdown, so you can change an itinerary's status directly from the list.
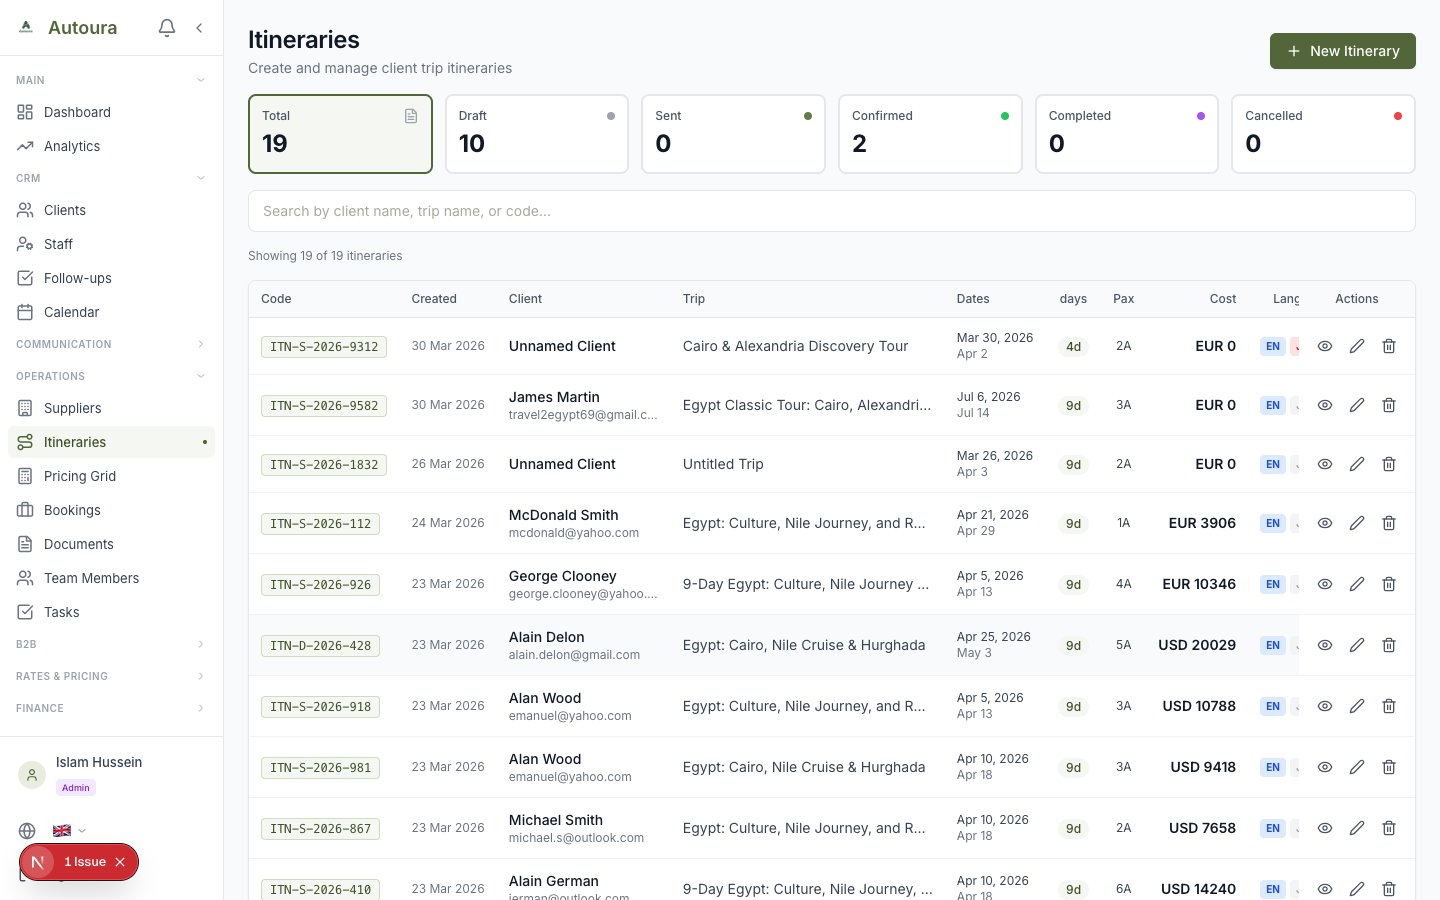
Itineraries list page with six status cards, search bar, and inline status dropdowns
Creating a New Itinerary
- Click New Itinerary
- Fill in:
- Trip Name (required, e.g., “6-Day Egypt Private Tour”)
- Client Name (required)
- Start Date and End Date (required — total days calculated automatically)
- Adults
- Children (0–50)
- Currency (EUR, USD, or GBP)
- Click Create Itinerary
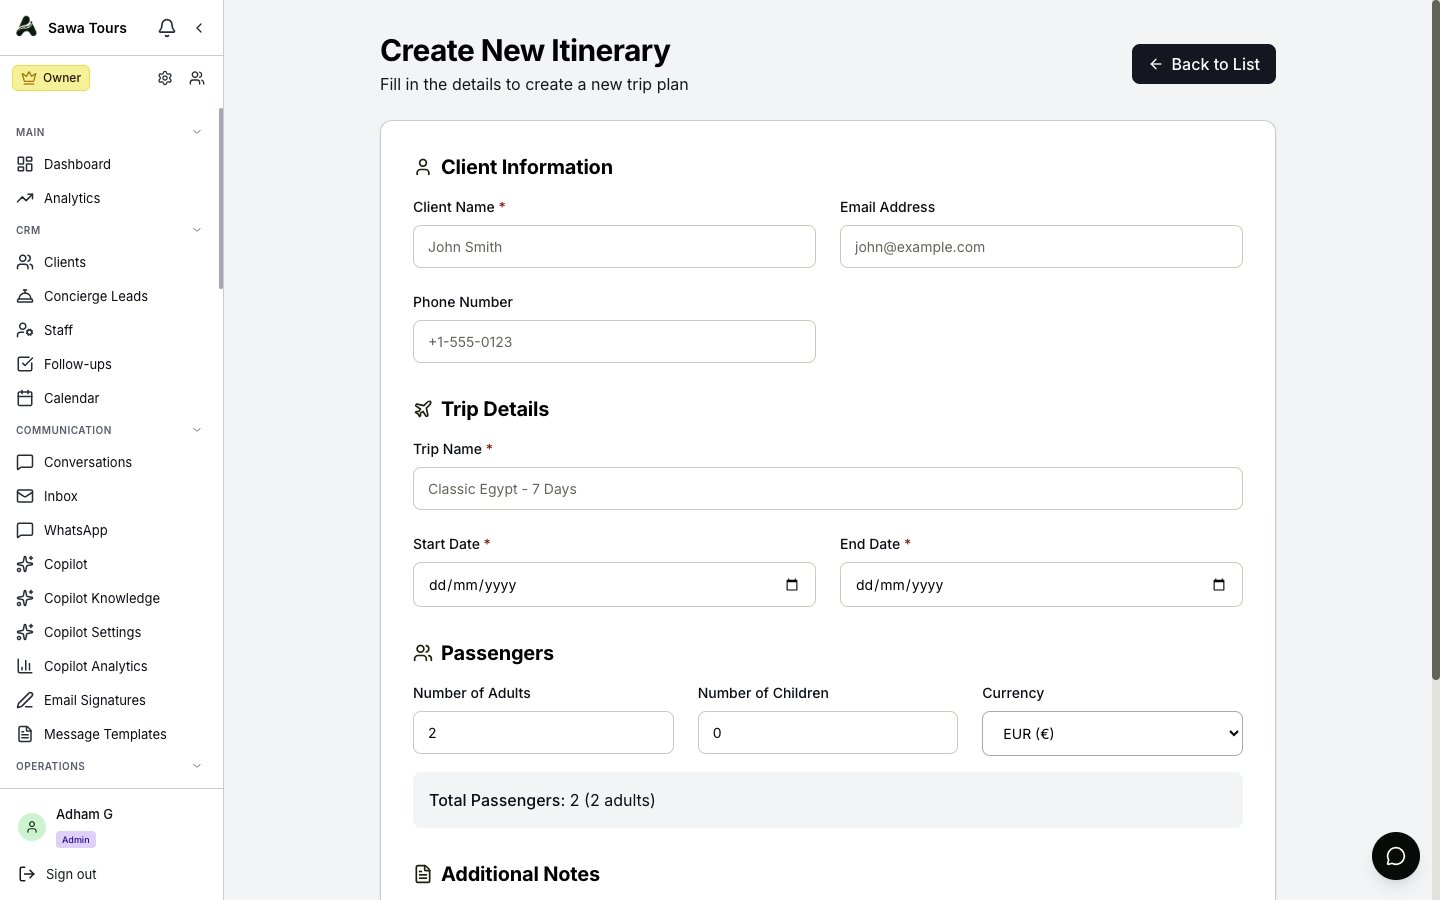
New itinerary form with trip name, client name, dates, adults, children, and currency
Editing an Itinerary
From the itinerary detail page, click the Edit button (pencil icon). The editor shows a workflow status bar across the top — AI Generated → Edit Content → Calculate Pricing → Download PDF — so you always know which step the itinerary is at. (The pricing step's button is labeled Price in Grid.)
Working with Days
- Each day has a city, title (e.g., “Arrival in Cairo”), and description
- Set the overnight city (where the client sleeps)
- Reorder days by drag and drop — use the “Drag to reorder” handle on each day card
Adding Services to Each Day
- Click Add Service under any day
- Choose the type: Hotel, Guide, Transportation, Entrance Fee, Meal, Activity, Tips, or other
- Enter the service name, quantity, and rates
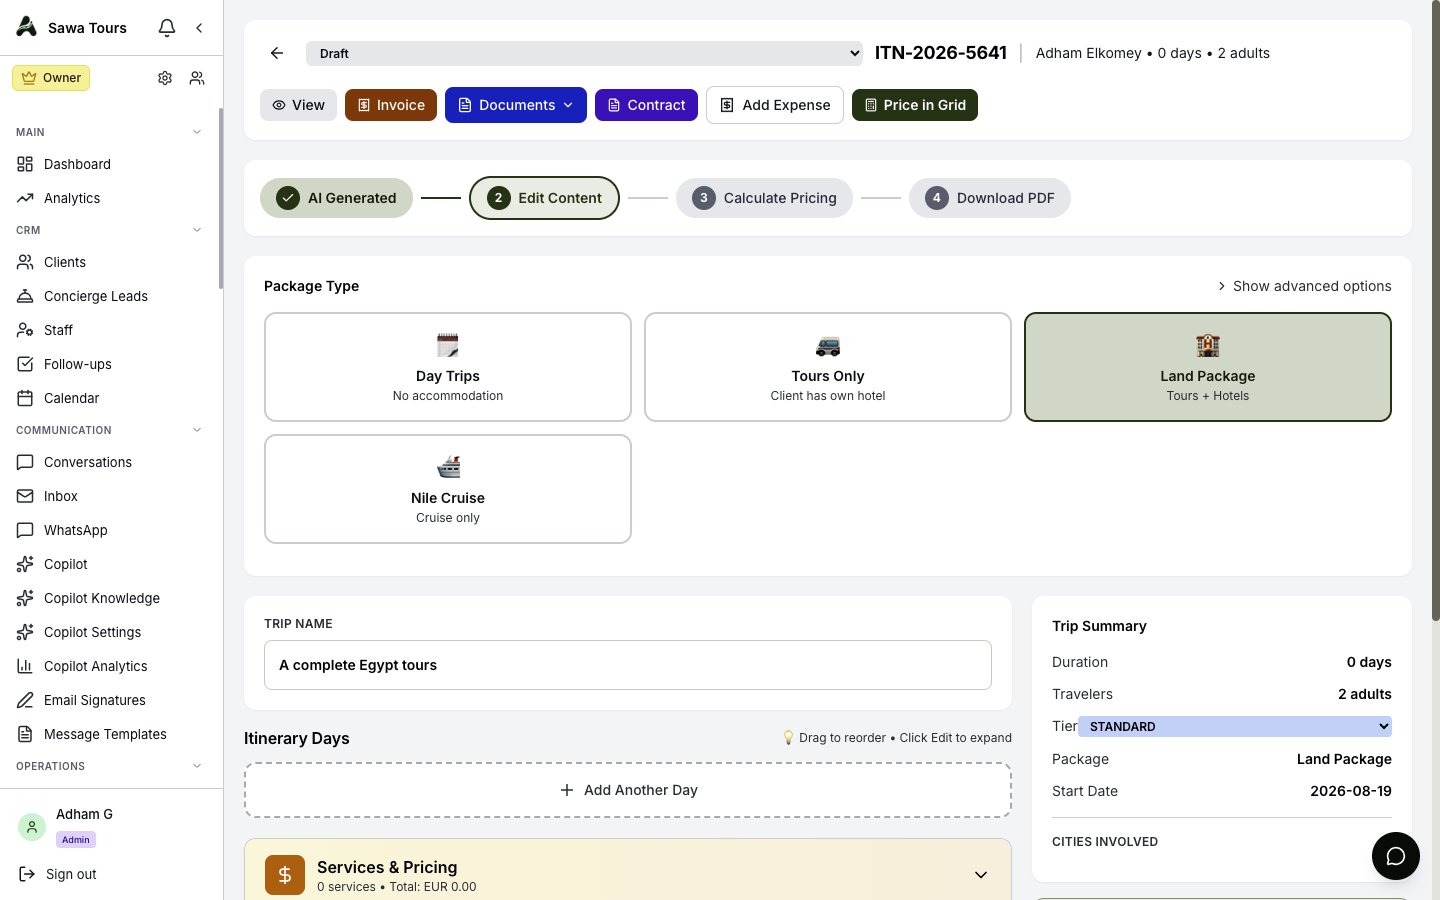
Itinerary editor showing the workflow status bar, draggable day cards, and the Price in Grid button
Pricing the Itinerary
Click Price in Grid to open the itinerary in the pricing grid, where every service is matched to your rate tables and the quote recalculates live. See B2C Pricing for the full flow.
Itinerary Detail Page
The detail page shows everything in a clean layout:
- Client Info — Name, email, phone
- Trip Summary — Dates, total days, travelers, total cost
- Assigned Resources — Guide, vehicle, pickup details
- Day-by-Day Breakdown — Click any day to expand services
- Expenses — Costs logged against this itinerary
- Profit & Loss — Revenue vs. costs breakdown
The detail page also has an Auto / Manual cost mode toggle. In Auto mode, costs come from the pricing calculation. Switch to Manual to edit each service's cost inline, right on the detail page.
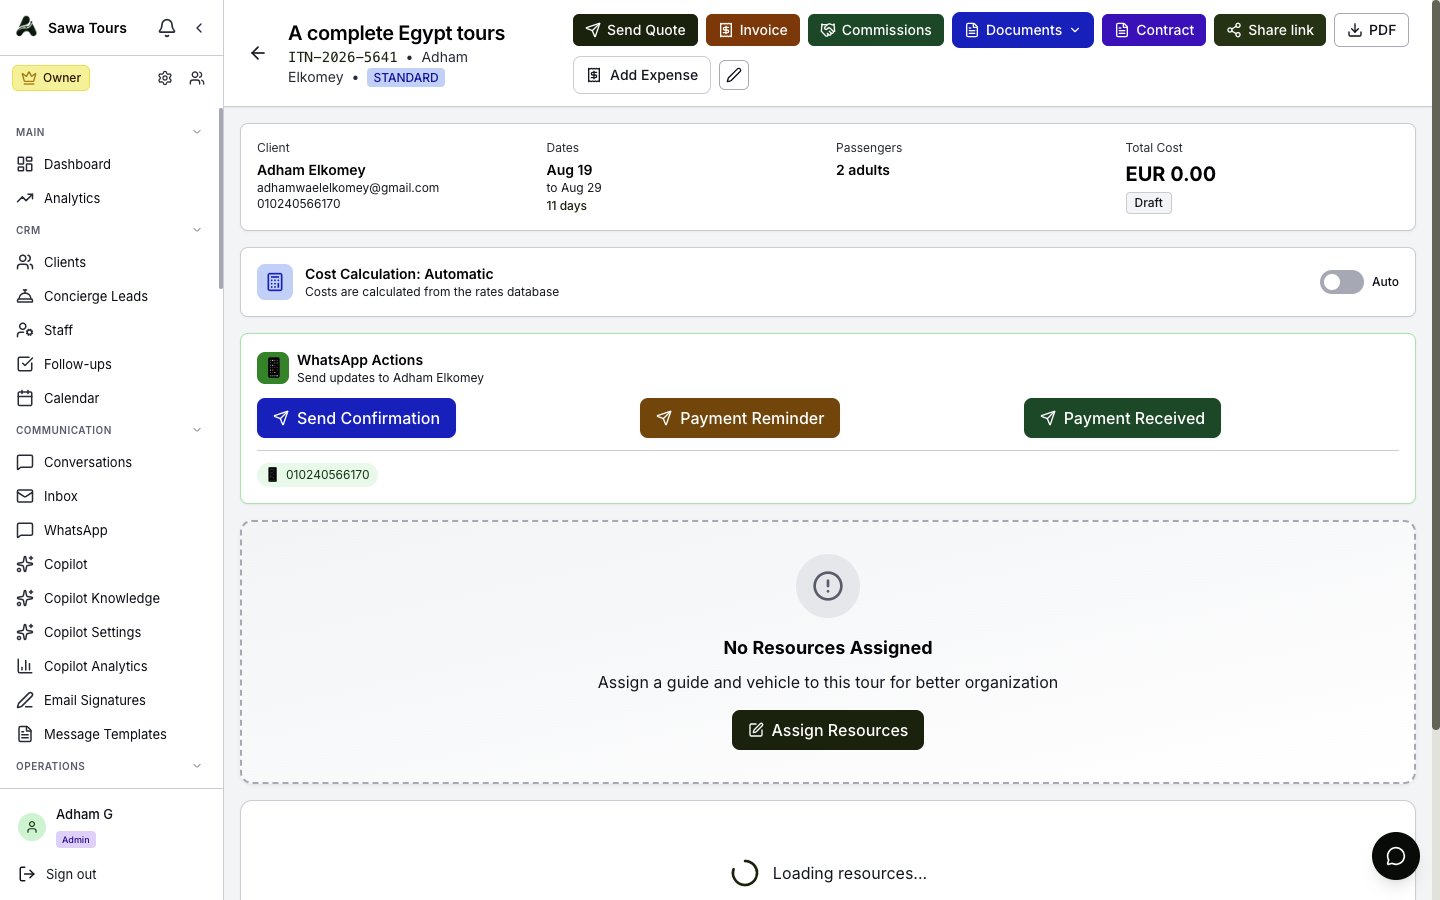
Itinerary detail page with client info, trip summary, and day-by-day breakdown
Itinerary Actions
The action bar at the top of the detail page offers:
| Action | What It Does |
|---|---|
| Send Quote | Opens a modal with WhatsApp and Email options — each option is disabled if the client has no phone or email on file |
| Invoice | Creates an invoice from this itinerary; once one exists, the button becomes a link named after the invoice |
| Commissions | Calculates commissions for all services |
| Generate Documents | Creates trip documents from the itinerary |
| Contract | Opens the contract page for this itinerary |
| Share | Creates a public share link for the client (see below) |
| Creates a professional PDF document you can share | |
| Add Expense | Logs a cost against this itinerary |
| Edit | Opens the itinerary editor |
Sharing with the Client
The Share action generates a private, token-protected web page for the itinerary — a link like /share/<token> that you can send to the client instead of (or alongside) a PDF:
- Branded — The page carries your logo and brand colors
- Client-safe — Shows the client total only, never your costs or margin
- Always current — The page always shows the latest version of the itinerary, so edits appear without re-sending
- Tracked — You see the view count and when the client last viewed it
- Revocable — Disable the link at any time to cut off access
Screenshot: Public shared itinerary page with operator branding, day-by-day plan, and client total
Assigning Resources
On the itinerary detail page, you can assign:
- A Guide from your guides database (with language spoken, daily rate)
- A Vehicle from your transportation database
- Pickup location and pickup time
Screenshot: Resource assignment section showing guide and vehicle selection with conflict warnings